Tuesday, April 10, 2012

Emerald City Comicon 2012 Con Report

Whoo! It's that time of year again! ECCC '12 was a great success in a lot of ways, though I do have to admit I was exhausted by the end of it. I'm usually the one who's ready and raring for a whole 'nother three or four days extra, but by the end of comicon I was really ready for some sleep-time. Part of that may have to do with last minute work and being so busy but I'm gonna blame it all on these puppies.
Holy God what was I thinking???
There are a few reasons why I thought it was acceptable to wear heels to Comicon. Firstly, there's a lot less walking and a lot more panel-sitting at ECCC, versus anime cons. The day prior I had done almost nothing but sit, of course I had bound my boobs down and sitting was tortuously painful on my ribs; "No worries" I thought, tomorrow this will be so blissful. Of course, the day I wore this costume was the day that I decided it was a bright idea to stand in a line for three hours. Luckily comicon's law regarding the wearing of shoes is far more lax than other conventions I've been to in the past, and I spent most of that line standing around in my muppet socks (which, weirdly got the most compliments out of anything I did that weekend. I think this might be a tad depressing).

SO. Comicon this year was great. There were great guests (most of whose panels I missed) and we were accompanied by Chase and Cassi, which was fun. Tobi and I were extremely busy and I was forced to break my cardinal costuming rule of not repeating costumes at the same convention, particularly two years in a row. It was still a great time though. The new costume that we debuted were very very fun, and, perhaps most notably, Wil Wheaton signed our stuffed rabbit.

Friday

Nothing much was scheduled for Friday this year. There were no celebrity guest panels, or anything we were real desperate to see. Nobody was really dressed up and attendance was pretty low. Con was only open for a couple of hours, but Cassi and Chase were excited to experience their first Comicon and had everything scheduled to the nines.

We all went as Princess peaches, Toad duo, and Moogle. Since they were all slightly interpretive I choose to believe that it's "Nintendo Mascot's go to High School".


Cassi was the cute girl that you find in the library

Chase was the pretty girl

Tobi and I were....well...we need no explanation.

TOAD. The princess is not in your castle.
These costumes have all been discussed before on this blog and aren't really new. We wore them to Kumoricon '10 I believe and they were fun. We all got a fair amount of attention, mostly due to Tobi's huge head. The best response was definitely from this one guy, who came running up, asked us to pose and snapped a picture. I had been excusing myself from some pictures, since I was a different universe, but I hopped in on this one, just for fun.
Me (grinning at Tobi): I photobombed.
Guy (very excited): AWESOME! I work for Nintendo, they're gonna love this at the office.
Me: ...
Me: Whoops. I really did photobomb...

I can't help but imagine the great expressions back the Nintendo office.
"Wow, these are great!"
"What a minute..."
"DAMN YOU SQUARE ENIX"

After we farted around for a while, we went into a Stand-up Nerd Comedy panel that was great. The first comic was hilarious, but I'm gonna put money down that the best part was the movie that was playing when we were let into the panel room. ECCC was the proud premiere of Scy-fy's "Seattle Storm" movie, which was playing when we were let into the panel room half an hour early. The movie was supposed to be emotional and thrilling, but the whole piece was so cliche (Tornadoes attack the city, actors fail to realize there are green screen special effects going on behind them, and the scientist who can save the world has a German accent) and the timing so unintentionally hilarious, that the crowd was roaring with laughter. It was fantastic.

The best part of the whole night though was the voice actor's panel. Various famous voice actors such as Tara strong of My Little Ponies, and Teen Titans; Maurice LeMarche and Rob Paulson of Pinky and the Brain; and so on; doing various famous movie scenes as their characters. It was fantastically hilarious and very cool to get to see the voice actors actually "doing" the voices. I'm a terrible voice actor, though I'd like to learn, and it was very cool to watch professionals at work.

Weirdly enough, even though this was the shortest day, it was probably the longest we stayed out, because we were all still awake. We had to park in some odd parking area, due to the garages being full, but it afforded some cool photo opportunities.


 Saturday


Saturday, again, regarded as the "Big Day" of conventions, was, well, it was insane. The convention sold out capacity and was, consequently, absolutely packed to the rafters with nerds. Seriously.
The problem with this was that, Emerald City Comicon, a normally quiet and relaxed convention, was not prepared for such madness and there was gridlock in all regions normally reserved for picture taking.

Only Spidy was given leeway, but then...wouldn't you?
No merch for you Mummy...
Tobi and I revisited our Empty Children costumes from last year, which was good fun, though not as gratifying as no large men cried at the sight of us. Though we did inadvertently chase a group of panicked teenage girls through the very crowded dealers hall.One of the only downsides was that the intricate wax hand wounds I made that morning fell apart before the day had hardly even started. But they actually came across pretty good in pictures regardless, so, hey, live and learn. For the most part I think the cheap costume wax, which I used last minute out of my make up box, was too soft and I needed to finish it with some latex to hold it on, but I ran out of time. The next time I do these guys, I'd like to get some nice wounds that will hold up to the constant motion of hand movements without leaving a trail of gore on the convention floor.
It was all still great fun though. We were followed almost continuously by a chorus of "mummy"s as we passed by groups of nerds. We also were hounded by several groups of (mostly girl) whovians for pictures.


Hey wait a minute there....
The most important thing though was that there were hundreds of awesome costumes all over the place and more panels and celebrity talks to go to than I could shake a stick at. We attended voice acting panels, George Takei, and Wil Wheaton to name a few and we spotted power rangers, weeping angels and, of course, the obligatory:

Adam WEEEEESSSTTTT
Empty children are always fun costumes to wear, easy to put on, and most of all, typically comfortable. I ran into problems this year though in that I decided to bind. I've bound before (binding being the act of flattening one's boobs with binder shirts, or, my preferred method, ace bandages), and I've gotten rather good at it. I got my chest flat, decide being a rather well endowed lady, and for most of the day I was actually pretty comfortable. It's a real art to get boobs bound flat without inhibiting your ability to breath. However this time, for some reason, the strain on my ribs made my back extremely sore. I had trouble sitting for long periods, which spelled trouble for all the panels we were planning to attend. Luckily I discovered that I could stand sitting so long as my arms were spread out; so I employed the yawn-and-stretch method and managed to keep my boobs flat without snapping a vertebra. But, man oh man, I must say, there is nothing like tearing off those ace bandages at the end of a long day.
BOOBS BE FREEEEE!!!

Sunday

Sunday was "Harvey Day" for us. Harvey, for those of you who don't read my my other blog; Tobi and I have a very special stuffed rabbit named Harvey, who travels with us whenever we go any place interesting or worth noting. This year we decided it was time to take Harvey to ECCC. However, low on time, and at a loss for costumes; Tobi came up with a great plan. Harvey, already appropriately named, would take on the role of Two-Face whom I had played in previous convention appearances, and Tobi and I would play his Sugar and Spice (a la Batman Forever).

Making Harvey's costume was great fun. I did it in much the same way that I made my own, and (obviously) with mostly the same styling. The orange shirt fabric was different from the stuff I used, which I had specially dyed and I was out of; but I had just enough of the other two materials, and managed to pick up some really cool orange tiger stripe at Walmart of all places.

fear me.

Luckily Harvey is roughly the size of an average infant, so I got some nice suit clothes from the value village and built the Big Bad Harv' half off of generalized approximations of the fabric. Likewise, with his facial covering I used his face to make a pattern (similarly to how I made the cthulu plush) and made a simple face shape that I could lightly stitch on without damaging Harvey's stunningly good looks. The fabric for his face was probably the hardest part, as for some reason (I can't imagine why) purple fur isn't a popular fabric in most shops. However, Walmart to the rescue again! Walmart was selling a variety of horrible dorm accessories in a variety of "oh-god-my-eyes" colour; including a bright purple bathmat. Cheaply made, the bathmat rubberize bottom was easy to tear off and, win! Purple fur fabric acquired.

Tobi opted to dress up as Sugar, the 'good' side of two-faces floozy minions. I got to be Spice. Tobi utilized Cassi's old moogle dress plus some feathers and a literal butt-ton of glitter and made a very beautiful, and classy Sugar to sit by Harvey's side. I, as spice, picked up an old jail-bait style dress, along with a red frilly shirt I had discarded from my original Two-face design and a corset that we re-purposed, to make a pretty fun Spice costume. It was very, very fun. We weren't super recognizable, but we got photographed several times even without people knowing who we were, and when they did...oh man, there was some excitement.
Two-face and Big Bad Bunny; we asked for his picture before he had the chance to realize what we were, but then we handed him the bunny and he had to run off and show his girlfriend. Far too adorable.
Of course the problem this day was that we all, all of us decided that heels were a good idea; despite knowledge that heels and conventions don't make good bedfellows. I was bright enough to bring a nice pair of flats that I switched into partway through the day when my feet just couldn't take any more.

The irony of this was that today was the day when I would be doing the most standing. Tobi and I opted to try and get Harvey signed by Wil Wheaton, who, graciously, doesn't charge for signatures. However, everyone had this same idea, and the line was unbelievably crowded. We waited for some 3 hours before being some of the last people to make it all the way through. We both ended up taking off our heels and enjoyed the lax shoe rules present at ECCC.
Totally worth it.


Ultimately, these costumes where excellent fun, and I think they looked great. Even if they did get glitter all over my house, (it's still there), and even if they were mostly last minute and even a tad stressful at moments. I always appreciate seeing a good costume come together and that will always outweigh any stress that may or may not going into making them. Sometimes it's the last minute details that really bring a piece together. The jail bait dress I wore had the tendency to climb skyward, so I added in the side frill, and some poof on the sleeves to keep the outfit more comfortable; I added the long black sleeve to keep the cuff from biting into my arms, and frilly underpants to retain some dignity, and those were some of my favorite details. I have a feeling these costumes will come back in the future; they were just too fun.

LESSONS?
1. Always, always bring backups if you think some part of a costume is going to bug you. Thinking ahead and bringing flats saved my day on Sunday when my heels became unbearable. I could always change back into the heels for pictures.
2. Take advantage of the things Conventions offer you; if someone you really like is offering free signatures, go for it! Or don't. Conventions are supposed to be fun! There should never be anything you have to do or have to see. If the line looks unbelievable, try for it next year.
3. Always do things early if you know you want them. Don't wait for the last day when everyone is going to decide they want a signature or a piece of merchandise, or a souvenir of some kind. Most people wait until the last day to get stuff, and it can make the dealers hall and the signature/picture room unbearable. If you do wait to the last day, make sure you know exactly what you want and where it is. The crowds can be stifling and it's a lot better than trying to browse among the herd.
4. I don't have a lot of fun repeating costumes, they don't get the same reception, and they aren't as exciting for me. But sometimes circumstances necessitate that you repeat. However, I learned, that I really don't enjoy it much at all. That doesn't mean I don't enjoy Con, but costumes are very important to me. I'll never begrudge others who want to repeat, but I will always continue to try and get some new stuff out there. It's how I roll.
5. Accessories are everything.
6. Sometimes, particularly at Comic conventions more than Anime; people will give you cards when they take your picture and urge you to visit their site for the image. Digging through all the pictures can actually be really fun, but it's a great idea to write what costume the card is connected to so you know which of your costumes you are looking for when you visit the site.
7. Next year will be better!

...
8. BOOBS BE FREE


Extra feature
Winner of the 2012 Best Costume Award for this nonsense blog goes to...

The Extremely Dispassionate Borg Cube!
He's 3-dimensional! He lights up! He's extremely dispassionate! He has no arms!
HE'S THE BORG

Thursday, January 12, 2012

The Project Wall

So I've decided to take the next few months (or longer, as the case may turn out to be) to really work on fleshing out my portfolio and learning some new costuming skills. So I've picked a variety of projects I've wanted to do that will hopefully stretch my limits! I'm not gonna put a deadline on any of these, or pick a convention to show them at, because more than likely they'll get repeatedly interupted by other ongoing and more pressing projects I have running, but the goal is to be consistantly working. Anywho, here's all the stuff I have lined up!

Cinderella Girl Genius - Both Cinderella Agatha and the Ugly Step-'Sisters'. Hopefully also the Fairy-GodZetha, which I've wanted to do for sometime. I'm probably, oh 9% done on this one, since I have most of the fabric and the absurdly huge hoopskirt. I've been talking about this one for a while but it's happening!

Tardis Uniform and a complimenting Dalek Dress. - I might try and cram these in before ECCC but it's unlikely they'll both get done. But I'm gonna try. I'm abou 5% on these guys. I've got a really good idea of what I'm doing and a little bit of fabric. I got (hopefully) enough fabric for the Tardis Coat (The bolt was a little short and then I got overcharged for it! Curses!) and a literal butt-ton of copper organdy. It was super cheap and the lady talked me into buying the entire bold. I have enough copper organdy to cover my floor several times over and roll around it...not that I would do that...it's very staticy material...(nobody touch me for a few hours, kay?).

Chaotica and Arachnia:Queen of the Spider People - Cassi, this one's for you. Also I want to try my hand at the bulky Arachnia collar. I plan to both of these and Satan's Robot, which would be a bit of an adventure in armour/bulky costuming. I've only really just got the idea and no progress on this one. I've scoured the fabric shops for days for something resembling their really unique costume fabrics (Seriously, Arachnia is wearing like, a beaded weave? What??? Points to me for picking a project requiring me to hand bead a whole dress -__-) and I have nothing to show for it. But at least I have an idea for how to do the rest. I really want to stick to the monochrome, black and white feel (even so far as to do the face paint in monochrome), which makes the fabric hunt even harder. It needs to be strictly shades of grey, which is harder then one might think!!!

Wampa and Tauntaun - These will be interpretive, like the Dalek and Tardis, and I'd like to have them for ECCC if I can. They'll be sort of chibi'd cute versions, since It's me and Tobi wearing them. The Tauntaun is Tobi's and I'll help her as much (or little) as she wants me to, but I'm enjoying thinking about how to build her yet another prosthetic butt.

Anyway, thats the list as it stands. I'll try and update occasionally.

Oh Also...this.
Nole the Christmas Walrus!

Monday, January 2, 2012

Cthulu Plushie: Quick and Dirty Tutorial

Ah, the post-Christmas post. This'll be a short one, but I made a little Cthulhu plushie for a present and I thought I would do a quick rundown of how I made him. He's arguably one of the cuter things I've done in recent years.

I got the idea to make him from several sources. Firstly, the collective love of Cthulhus, and Michaele's style, and also the fact that I had just enough left over fabric from the Riddler Pajama's to pull together a plushie.
First I had to make the pattern, which is not something that I have done much of. For the most part the pattern was free handed, but I used Jamie, the GasMask Bear as size referance since he was about the size, and pot-belliedness that I was looking for.
I didn't have a whole ton of fabric, so I didn't give myself a ton of seam-space, particularly on the tenticals because they were a little dicy to begin with. This was a bit of a mystake. The Ultra-cuddle fabric I was using is extremely finnicky, and needs a decent seem for the stitch to hold at all. Most of the tenticals ended up needing hand stitching. Also, Pins are just about worthless, the fabric is slipper and they tend to either get lost or slip right out.


This is the prechanged head. Ideally stuffed animals should have more character in front, than in back. Thus having a spherical head is no good. Typically the back of the head should be flat, so the front can 'pooch'. But I, being inexperienced, wanted to make it spherical, and stuff it so I could judge how much I wanted to cut out of the back, instead of patterning it that way. I stuffed it, figured out the back, unstuffed and put a seam in the back, to pouch out the front. The trick is that you have to get it right the first time though, or this fabric will just fall apart when you try to rip the seams.

The body was pretty straight forward, but it took a little trying to get the angle I wanted on the head. In the end I handstitched the head on with a plus sign shaped seam. first I did a short front-to-back stitch, securing the head to the neck, and closing the body. Then I stitched slightly side to side under the tenticals to keep his head positioned just the way I wanted.
 The Cthulhu did go through a small rebellious phase, like all young ones do.
Original I was gonna give him little stubbly limbs, but there were little stumps where I planned to attach the legs and those were adorable enough that I decided to keep him as just a torso. I think he was cuter for it.

D'awww, isn't he adorable? I was very happy with how he came out. The eyes were a lucky find, I had two little black shoe buttons that were perfect. I dimpled them into his head by stitching them tightly and then looping a thich thread from one eye to another inside of his head. The wings were a last minute touch and light stuffed with wire framing in the top section.

Now you can rule the underworld and be adorable.

Wednesday, September 21, 2011

Latex Mask Making: WIP

I did these a while ago, but haven't documented the actual latexing process yet. I'll add that later.
Now first, I have the head already molded. I did this with Monster Clay, sold from the Monster Makers. Don't use any old clay, it has to be a specific oil-based consistency. I'll post more about this process later when I recover the pictures. it requires a lot of heating, mixing, waiting, and very patient molding. This is my finished product. Luckily since the mask I'm making is extremely simple, it wasn't too altogether difficult, far less than my next mask will be.

First you have to make a "Wall". It needs to be halfway across the head, following the natural line of the head (so, halfway on the top of the head, and then around the back of the ears). This is a special water-based clay that's a totally different consistency than the monster-clay. Use a clay cutter (it's a length of string and two wood handles, to the left of the clay there). Cut the clay in longer, thinner pieces, and make it about an inch thick.

Make sure that the wall has these little knobs on them, they help the mold fit together later.

Now mold the back of the head. This is done with Ultra-cal, a relative to cement and equally finicky. It's horrible. Do Not Mix Much. It starts out too wet to use, then there is a two second period where it is perfect, then it becomes hard as a rock. Mix less than a pint full at any given time. Also the amount of water-to-ultra-cal ratio is extremely finite, I continued trading off adding ultra-cal and water between long periods of seeing if it would dry. The first couple layers will be extremely rough. Avoid using the ultra-cal when it's too think and globby on the first couple layers in order to avoid air bubbles. This is one of those processes that takes a few masks to perfect.

I mixed the ultra-cal in a large bucket like this, but in retrospect I wasted a lot of my materials because I poured too much and it dried. I would suggest getting a smaller mixing bowl to use (one that you don't care about, mind you). It's better to have to wait between batches than waste money because you mixed too much and it hardened. This is one those, long-periods-of-boredom-off-set-by-moments-of-sheer-panic, type processes.

Then we remove the wall, and place a few strips of clay on the mold wall (as seen in the picture above). Also cover the mold wall in Vaseline to help aid in the separation. Next time I might try putting Vaseline on the whole head mold as well. Now you can start making the front half, just the same as you did the last. It's also a good idea to occasionally lay down a layer of burlap between the mold layers, as it reinforces it. Do this similar to how you would do Paper Mache, dip strips of burlap in the Ultra-cal and cover the mold with it. This should ideally be done as the outermost layer of the mold as well.

Now, after drying, Separate! The layers dry pretty fast, so you can do this quite soon. The minute the walls get hot, you can pull them apart. Now, this is my first mold, so I messed up in several places. I think I made the ridge between the halves too high and it made it harder to separate them, and it messed with the structural integrity, and part of it cracked (bad news bears). Now, separating these halves is (pardon my french), a real bitch. The back half came off quite easily, (as the manual said it would) but the front half, no matter how hard I tried, would just not come off. At one point I literally had it on the ground, my feet pressed up against the edges, yanking on it. I finally had to pry it off with a hammer and chisel, which is no good because it damaged both the inside of the mold, and my mold-head itself. It was terribly frustrating, and required a fair amount of cursing, yelling and jumping on things.

But eventually it did come off. I though I would be relieved, but I was really just too tired. The two mold halves are united by a thin layer of latex between them, and then strapped together.

This is the inside! I had a few air bubbles in the mold that left little pockets that I had to fix it with a thin layer of Ultra-Cal just in the holes. This is not really an ideal situation, so next time I will definitely be more careful in the molding process.  
After I finish Latexing and painting the thing, I will post the process. Then, next, now that I've more or less learned the ins and outs I plan to make and Ood costume for Emerald City Comicon 2012. Whoo! Should be exciting (if not, slightly, intimidating).

Tuesday, April 12, 2011

Quick Post: WIP pictures

ARGH. Haven't posted on here in a while, not because I haven't been doing anything but because I've been incredibly busy!
FIGURES.

But I'm trying to do some housekeeping and this is a part of that. So check off on more notch on my list-oft-things-I'm-a-loser-for-not-doing-sooner.

This is mostly picture heavy and probably not of any concern to people other than me but regardless I need to post the pictures so I can clear them off my computer, haha.


I've been working on and off on a cosplay of Agatha from Girl Genius (obviously one of my favorite comics ever). Now, some of you more anal retentive readers might be thinking "But wait! We've already seen the Agatha costume. She's cheating!"
Well, no. Actually. You haven't.

We made an Agatha costume for Chase a few years back based on the paper-doll Agatha design that turned out so-so. But now, I've obsessively begun work on this:

Drawn and designed by team Folio and therefore not my property. Go check out the comic for the full plot arc!!!
That's right. Cinderella Agatha from the most-excellent Cinderella side-story featured in Girl Genius a few years back. I fell in love with this dress ages ago and have finally decided to take it on. Needless to say I'm stoked.

First things first we need a hoop skirt. I have one already but it was tiny, and pretty busted up. It was also not something that I should really cut into, which is something I need to do so I can create the window in the front of the skirt. I considered making a hoop skirt (which is easier than it sounds) like a good little costumer, but I found this one online for FAR cheaper than I could've bought all the materials.

This picture doesn't do the size justice (my room makes it looks smaller), it's pretty friggin' big. I actually have a big croline petty skirt that makes it even bigger and rounder (not pictured).
I'm also in the process of making the corset (My First Ever!) Whee!
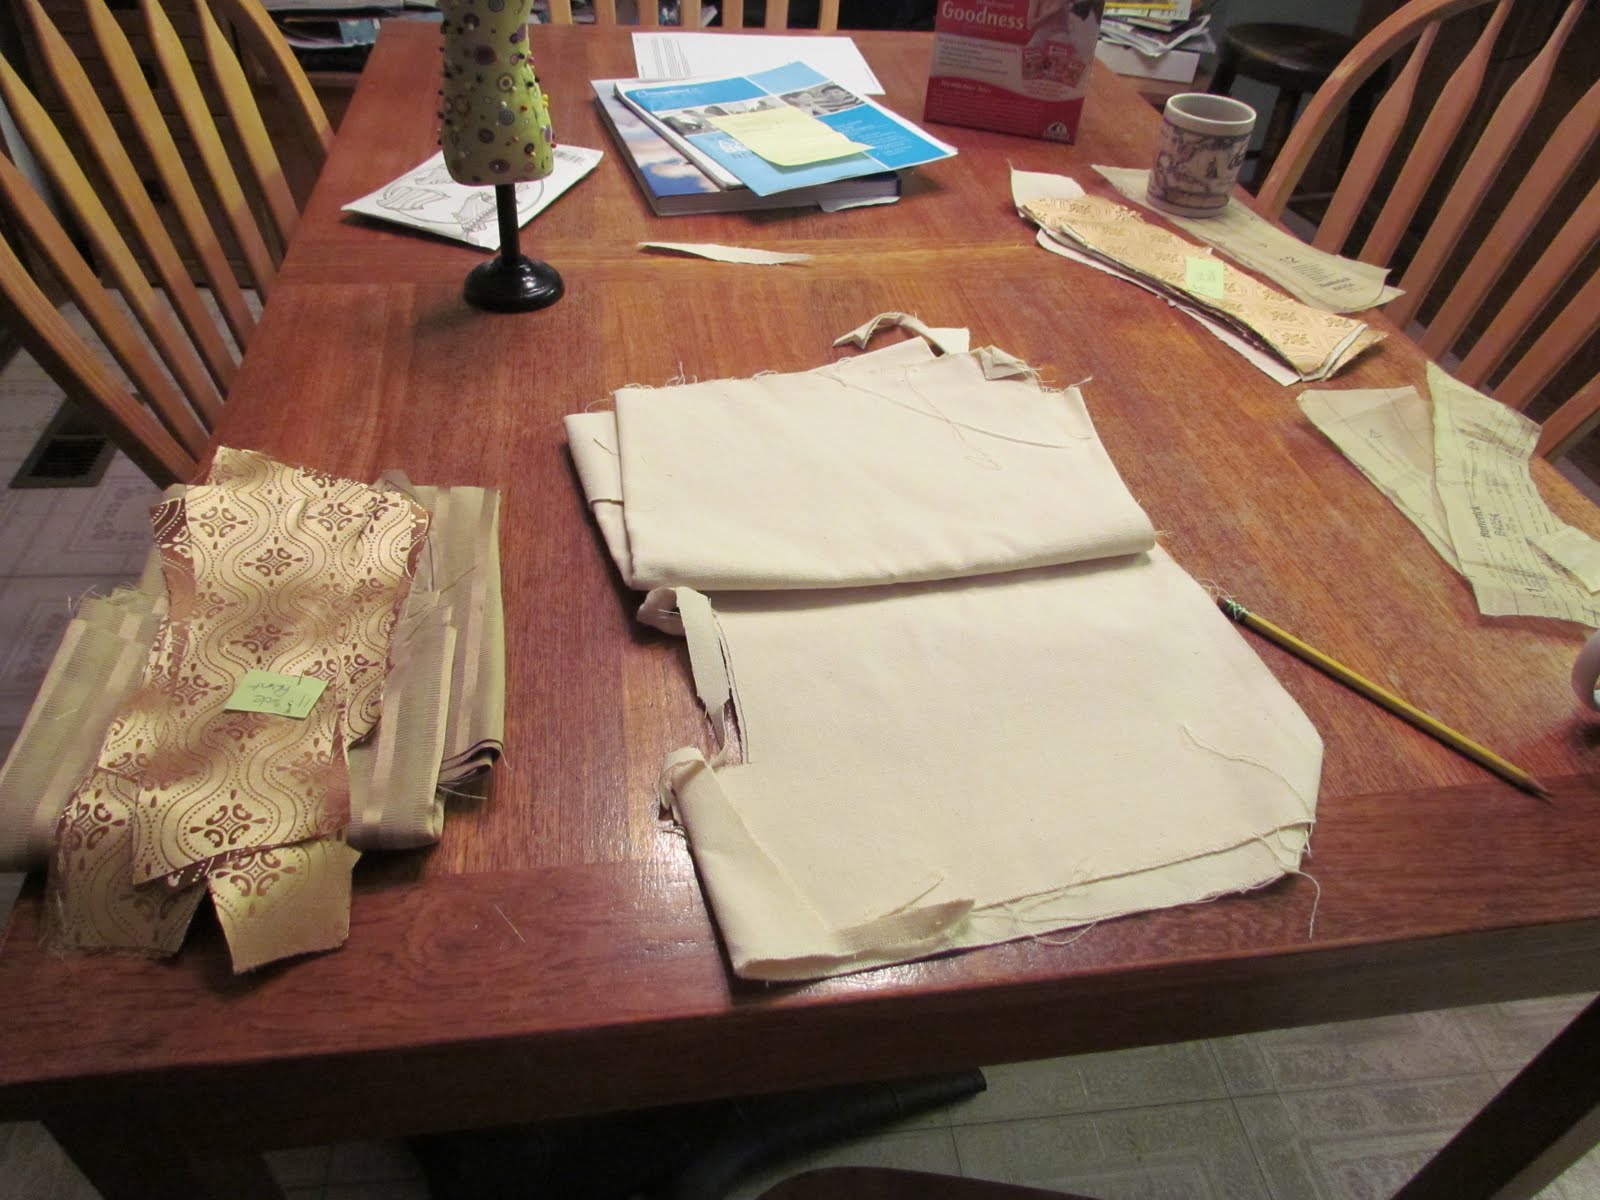
First off I have my nice fabric which I got stupid cheap. Then the busk, which gives the corset body, and then the pattern pieces, which I altered for the shape I'm trying to get.

My pretty corset exterior!

My horrible ironing board. Trying to iron out the fabric on this sucker was a nightmare. I've been petitioning for a new ironing board for ages.

Cutting out the pieces! I used an altered Butterick pattern. It worked great!
I was working furiously on this for a while but had to take a break so I could work on the multitude of other projects I got going. Hopefully I can get working on it again.
I'll post more pictures as I take them!

Tuesday, March 22, 2011

Of Thesises (Thesi?) and Minions!

Been working all week on a friends art college/thesis/web show thingamithing.
I've mentioned Blush Corp a few times in these posts but now that I've actually started working on it, its time to start talking about it!
(which also trumpets the first time we're going to be talking about current costume work in this stupid thing). Sweetness!

So, Blush Corp was created by my friend Cassi and a couple of her minions (read: Friends) while they were hanging down in Portland. Essentially, from what I understand, they all dressed up as kooky, dorky villains and ran around disrupting typical Portlandian life. If such a thing is possible.

Quickly the whole thing evolved in a rather brilliant little story about a group of villains who band together for the sake of greater good. Led by Lady Blush, her three minions, Subtlety, Retna Burn and Corporal Cunudrum act as essentially "Anti-villains"; people working for the forces of good, through the forces of evil. (if that makes any sense).

Basically, they're anti-villains. They do (conceptually) good things, in really dirty ways. For example: Those kids not eating their veggies? Take their favorite junk foods, bring them to life, make them giant and let them ravage major cities. Kids will realize that only the veggies are safe!

Cassi is putting together a short series of interactive sketches for her thesis project and has brought me in as a minion. So yesterday we ran around like mad chickens to value village and acquired all we needed for the adjustments to the costumes. Although the Blush Corp costumes have already been established, Cassi wanted to re-design some of the costumes before the show.

Today Tobi and I (mostly Tobi) worked on the new Subtlety costume! Which is really adorable, and I'm loving how it's turning out.
Subtlety is based around Tobi's basic personality. Essentially Subtlety is the essence of...well...non-subtlety. She wears bright colors, underwear on the outside, and carries around her weapon/best friend Sizzles, the happy frying pan.

This is Subtlety as she was in the original design. The green stripe tights are a commonality between all the minions. Most of the SHAPE of the original costume is still present in the redesign, particularly since we found keeping the underwear on the outside really important to her costume as it represents a lot of her personality. Subtlety, if all the minions represented ages, would be the five-year old. (Retna is about 10; Corporal is  a grumpy verge-of-puberty 13)
This was my contribution to the discussion of Subtlety's redesign. Cassi and I talked about having her be leaning more towards the yellow end of the spectrum. I, being unable to quickly and effectively draw out what I'm talking about (being Disgraphic), I made this quick mashup of images to get across what I was thinking.

And this is the final product that Cassi drew out. You can see the original HERE on Cassi's blog. But clearly awesome. Subtlety is now primarily yellow based colors (green, orange and pure yellow), and absolutely BEDECKED in bells (which I LOVE)
We aren't QUITE able to bring the whole picture to life in such a short amount of time, primarily the shoes as we have neither the time nor the budget to get our hands on those beauteous high tops.


Wait! It's TUTORIAL TIME:
Dying shoes 101: 
Grade: Easy Pie

Sometimes it's really hard to find shoes that are the color you need them to be. For example, the above high tops only come in very basic converse colors (red, white and black). And I have to admit, I'm not a huge fan of boot covers. They tend to be made out of thin fabric and they LOOK it. It's really hard to make boot covers out of fabric that actually looks like something a shoe would be made out of. So sometimes, it's just better to dye.

Side note: Don't PAINT them. We have tried it and it usually results in splotchy coloring or shoe shrinkage/stiffness. Not awesome.

Sometime I'll do a better tutorial of the actual dying process, but for now you just have to put up with the basics here.

Take a good brand of dye. (by 'good' I mean not something that shows happy 5 year olds at a tye-dye party. Don't judge books by the cover, but you can totally be dye-judgemental. If it looks professional, it probably is, more or less).

Put it in a nice bucket or basin of warm/hot water. Make it hot, but not so hot that you can't keep your hands in it. The bucket needs to be big enough to fit the shoes, but don't overfill it with water, or you risk washing out the color too much (literally).

Now: the shoes need to be something that will take dye. Usually you can feel if a fabric is dyeable. If it feels fibrous it will probably dye. It its more slick or rubbery (even if it's cloth) it might not dye well. If you want to dye shoes, best to stick with canvas.

Alright, now dunk 'em! Pull them out every so often to check the progress. Swill the water through the shoe, and try and give everything an even current. When they are the appropriate color, pull them out and put them somewhere easy to dry! Tada! Easy.


BACK TO THE TOPIC:
So today Tobi and I got together and began work on Subtlety. The Primary focus was getting the underwear painted and the shoes dyed. The shoes were easy. We used straight 'yellow' Tulip dye (not my favorite brand but good for really primary colors) on the shoes and laces and they came out a great color after a bit of washing through the dye.

The bra and underwear were bought super cheap at Walmart (read: Den of Evil) and amazingly already pretty good shades of yellow. We wanted something pretty conservative in shape. The last thing you need is some sexy underwear on the outside. Not hot in the slightest.
All we had to do was add the red polka dots.

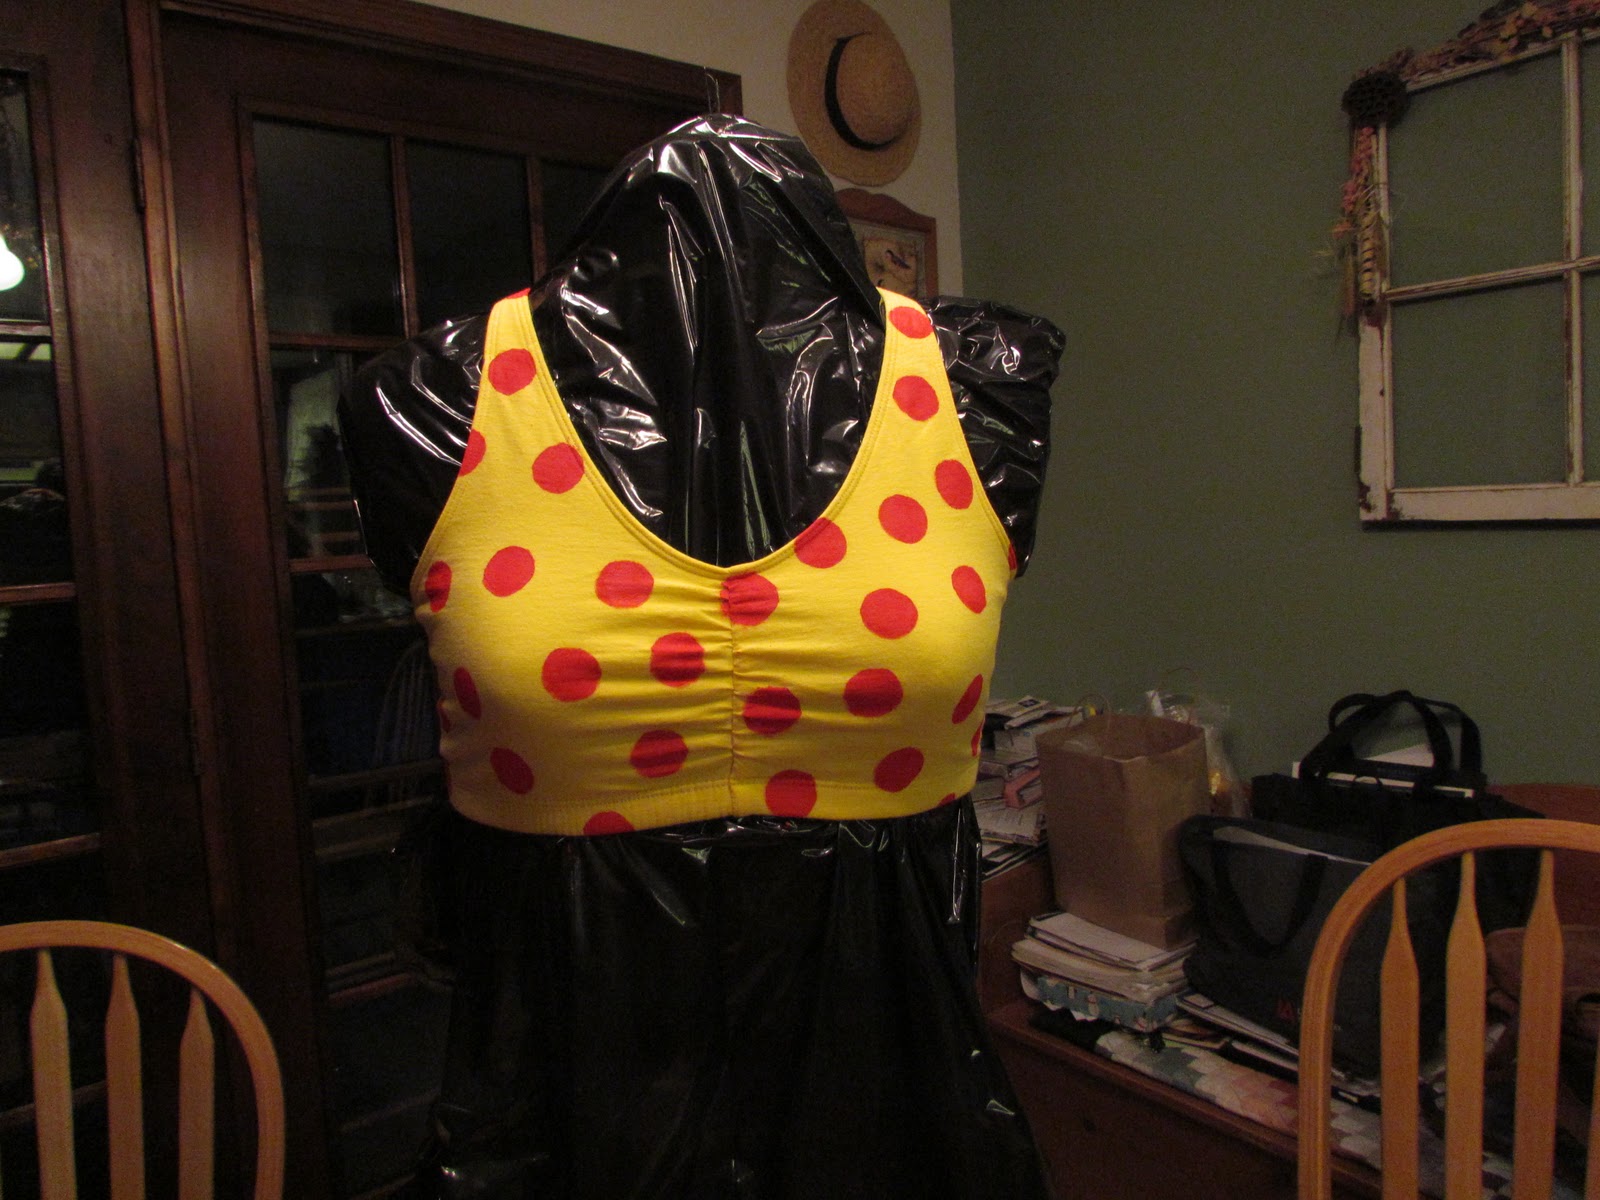
First we put a trash bag over my trusty dress form Betty, and put the bra over it. Then we took a piece of thick card stock paper and cut a circle in it as a stencil, (I advise always working with stencils when fabric painting. No matter how steady your hand is, once it's on there it's not coming off). Then Tobi went to work! (It's a one man job).


We used Tulip "Soft" fabric paint. Always try and get stuff that's not gonna be stiff and crackly, particularly on stretchy fabric like a sports bra.  Again, Tulip isn't my favorite brand, and it looked too hot pink rather than red, but it appears to have dried alright.

There it is all finished! Looks pretty good!
Now, that was the easy part. The Underwear is a little more...bizarre...
For starters. What do you put it on? You want to stretch it out about as much as it will be when worn so that the dots (or whatever) don't look bizarre later. But, unlike with the bra, you can't just stick it on the dress form. So...our solution?

Andy the Panda Bear. Wrapped in a garbage sack. Provided we kept his feet inside the underwear, it was approximately the right shape and there weren't any wrinkles in it. We tried his head (seen above) but it wasn't big enough XD
Slightly awkward looking (okay, super terrible, bizarre looking), but worked pretty darn well! The number one thing about costuming is thinking outside of the box. Things are never only useful for the reason they were made for. That applies (quite clearly) to every facet of costuming.

Here's the circle pattern we made. For a second time I bring up the importance of using a stencil. It's much easier/faster/more reliable. Just make sure it's movable enough to fit the contours of the garment, but not too thin, so the paint doesn't leak through.
Now it's drying overnight and we should have a full set of polka dot underwear by tomorrow! Hurrah!


Also today: Cassi wanted Corporal to wear a pair of green Bermuda shorts with yellow accents. We couldn't find anything sufficiently colored, but we did find a pair of white shorts with yellow stripes on them. Since green and yellow are a close enough color, I figured we could dye the shorts green and the yellow would come through the dye.
Here's the result! I'm quite happy with it.
Turned out pretty good! The shorts could be more vibrant, but I think the tights makes up for the lack of blinding green.
More pictures as it happens!